Mary Berry Tarte Tatin Recipe (a must try traditional homemade)
Today’s Mary Berry Tarte Tatin Recipe is a lovely way to turn a few simple apples and a sheet of puff pastry into a pudding that looks special without too much fuss.
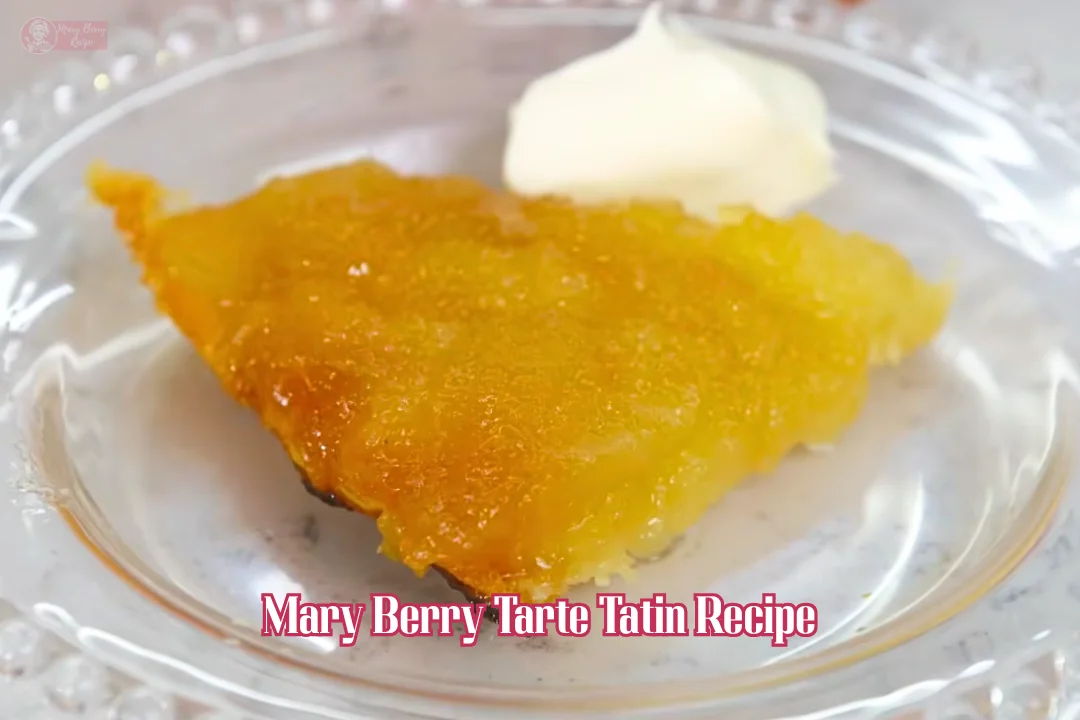
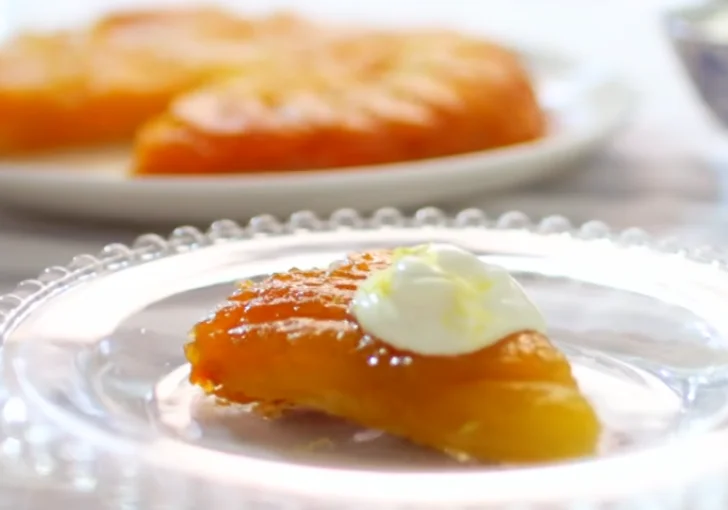
It has sweet, golden caramel, tender apples and crisp pastry. I like serving it warm with a spoonful of crème fraîche, which balances the sweetness nicely.
Tarte Tatin is a classic French apple tart. The apples cook beneath the pastry, and the tart is turned upside down before serving.
This gives the fruit a glossy caramel coating and leaves the pastry underneath.
It is said to have become popular through the Tatin sisters in France, and it remains a favourite in homes and restaurants today.
For this version, I use a Bramley apple to make a soft apple purée, then add firm English dessert apples for a lovely layered filling.
Ready-rolled puff pastry keeps the work simple, so you do not need to make pastry from scratch.
The best part is the moment you turn the tart out and see the golden apples on top.
It may look like a pudding for a special occasion, but the method is quite simple once you know a few useful tricks.
Give this apple tarte tatin a try, and serve each slice with crème fraîche for a lovely finish.

Which Apples Work Best for Tarte Tatin
Bramley apples work best. They are tart, they break down fast, and they turn into a lovely smooth purée with hardly any effort.
Pick firm ones with no soft patches or bruises, and look for a bright green skin. A big Bramley around 250 to 300 g is perfect here.
For the sliced layer, I use English dessert apples like Cox, Braeburn or Gala because they keep their shape in the oven.
Eating apples alone can taste a bit flat and sweet. Bramleys alone can turn to mush. Together they give you sharp, sweet, soft and neat in every bite.
Reasons To Make This Mary Berry Tarte Tatin
It looks lovely on the table. The glossy apples and golden caramel give this tart a smart finish, even though the ingredients are simple.
Ready-rolled pastry saves time. I use a sheet of puff pastry rather than making it from scratch. This makes the recipe easier to manage on a busy day.
The apples bring two different textures. Firm dessert apples hold their shape, while Bramley purée adds a soft centre and a little sharpness.
You do not need special baking skills. The main thing is to watch the caramel and give the pastry enough time in the oven.
It is easy to serve. A warm slice with crème fraîche makes a lovely pudding after Sunday lunch or a simple evening meal.
You can prepare parts in advance. Make the apple purée ahead of time, then assemble and bake the tart when you are ready.
Mary Berry Tarte Tatin Ingredients
For the Caramel
150 g caster sugar – Caster sugar dissolves quicker than granulated, so you get a smooth caramel with fewer lumps. Tate & Lyle or Silver Spoon both work well. Weigh it properly, because too much makes the caramel hard to handle.
3 tbsp water – Just enough to wet the sugar so it melts evenly. Plain tap water is fine. Use level tablespoons, as extra water makes the caramel take much longer to colour.
For the Apple Purée
1 large Bramley cooking apple (about 250 to 300 g) – This is the star. Bramleys are sharp and fluffy when cooked, so they mash down easily. Look for British Bramleys at Tesco, Sainsbury’s, Waitrose or your local greengrocer between autumn and early spring.
1 tbsp caster sugar, or to taste – It softens the sharp Bramley flavour. Start with one spoon, then taste the purée and add a little more if your apple is very sour. Silver Spoon works well here.
1 tbsp water, if needed – Stops the apple catching on the bottom of the pan at the start. Add it only if the pan looks dry, as the apple makes its own juice as it cooks.
For the Apple Filling
4 medium English dessert apples (about 600 to 700 g before preparing) – These hold their shape and add natural sweetness. Cox, Braeburn and Gala all work. Pick firm ones. Soft or floury apples turn mushy and spoil the neat pattern on top.
15 g softened butter – Used to grease the sides of the tin so the tart slides out cleanly. Lurpak or Anchor are good choices. Make sure it is soft, not melted, so it spreads thinly.
For the Pastry and Serving
320 g sheet of ready-rolled puff pastry – It saves loads of time. Jus-Rol is easy to find in the chilled aisle, and most supermarket own brands are good too. All-butter pastry tastes best, so check the label if you can.
Crème fraîche, to serve – Its gentle tang cuts through the sweet caramel. Président, Waitrose or Tesco crème fraîche all do the job. Spoon it on the side, never on top, so the pastry stays crisp.
How To Make Mary Berry Tarte Tatin
Step 01 – Prepare the Equipment and Ingredients
Preheat the oven to 200°C fan (220°C conventional). Prepare a 20 cm fixed-base cake tin, a stainless steel saucepan, a chopping board, a sharp knife and a small saucepan with a lid for the apple purée. Measure the sugar and water before starting the caramel, as the process requires careful attention once the sugar begins to colour.
Choose a cake tin with sides deep enough to hold the apples and caramel, and avoid using a loose-bottomed tin because the caramel can leak out.
Step 02 – Make the Caramel
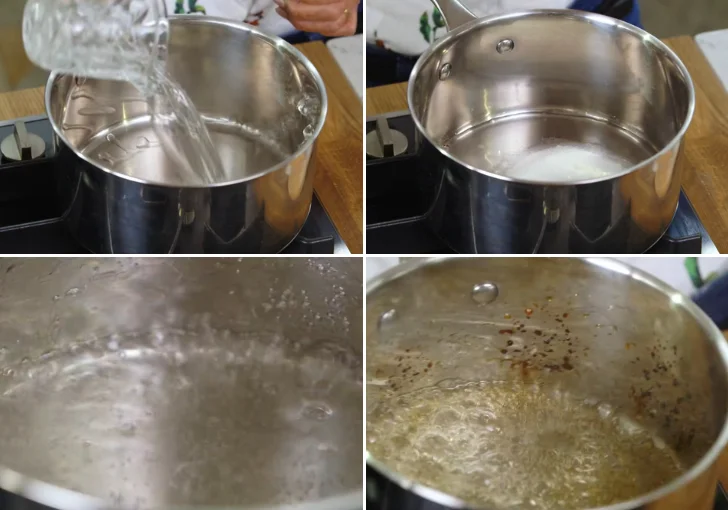
Place 150 g caster sugar and 3 tablespoons of water in a clean stainless steel saucepan. Set over a low heat and allow the sugar to dissolve gradually, gently swirling the pan if necessary. Avoid stirring once the mixture begins to heat, as agitation can encourage crystallisation. When no sugar granules remain, increase the heat to a steady boil.
Let the syrup bubble until it thickens slightly and turns a pale golden colour. Watch it closely, as caramel can darken very quickly and develop a bitter taste if it burns.
Step 03 – Pour the Caramel into the Cake Tin
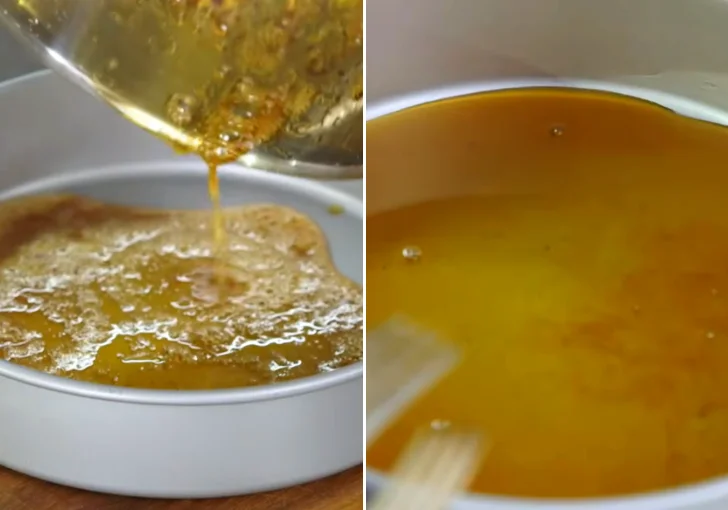
As soon as the caramel reaches a pale golden colour, remove the saucepan from the heat. Carefully pour the hot caramel into the base of the unbuttered fixed-base cake tin, tilting the tin gently so the caramel spreads across the bottom in an even layer.
Take care not to touch or taste the caramel, as hot sugar can cause severe burns. Set the tin aside on a heatproof surface and allow the caramel to settle while preparing the apples.
Step 04 – Prepare the Bramley Apple Purée
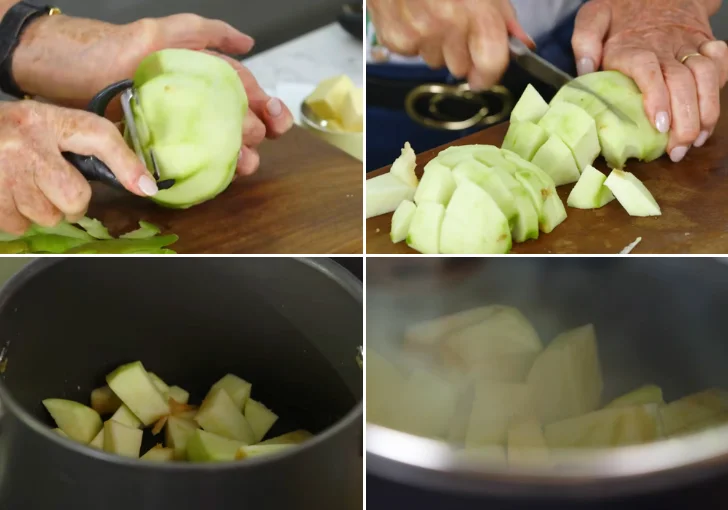
Peel the large Bramley apple, cut it into quarters and remove the core. Chop the flesh into small pieces so it cooks evenly. Place the apple in a small saucepan with 1 tablespoon of caster sugar and, if necessary, 1 tablespoon of water to prevent it catching at the beginning.
Bramley apples are naturally tart and break down readily during cooking, making them ideal for a smooth purée.
Step 05 – Cook the Apple Purée Until Soft
Cover the saucepan with a lid and cook the apple over a low to medium heat, stirring occasionally to prevent it sticking to the bottom. The lid traps steam and helps the apple soften without requiring much additional liquid.
Continue cooking until the pieces have collapsed completely into a soft mush, adding a small splash of water only if the pan becomes too dry. This should take approximately 10–15 minutes, depending on the apple and the size of the pieces.
Step 06 – Mash the Purée Until Smooth
Remove the lid and mash the cooked apple thoroughly with a fork or potato masher until it forms a thick, soft purée. If the mixture appears watery, cook it uncovered for another minute or two, stirring frequently, until the excess moisture evaporates.
Taste the purée and add a little more sugar if the Bramley apple is particularly sharp. Leave it to cool slightly before assembling the tart so it does not make the pastry soggy.
Step 07 – Butter the Cake Tin
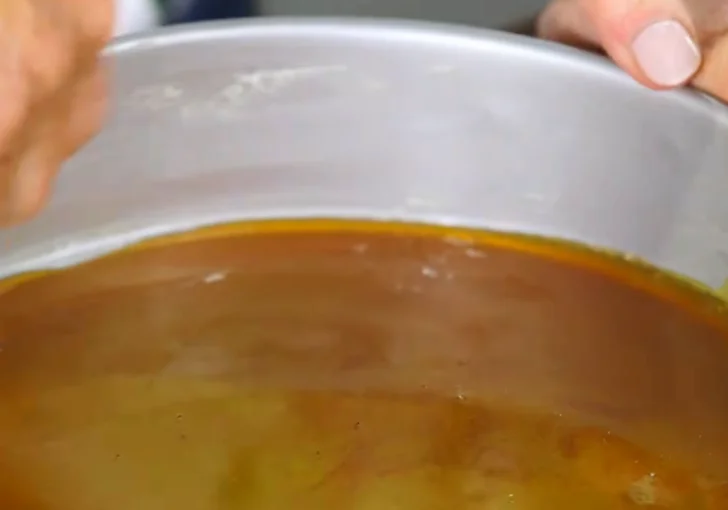
Once the caramel has settled in the base of the cake tin, carefully grease the sides of the tin with the 15 g softened butter. Spread the butter evenly around the inside edges without disturbing the caramel layer at the bottom.
Although the tin was left unbuttered when the caramel was poured in, greasing the sides now helps prevent the apples and pastry from sticking during baking and makes the finished tart easier to release.
Step 08 – Peel and Slice the Dessert Apples
Peel the four dessert apples, cut them into quarters and remove the cores. Slice each quarter into even pieces, approximately 5–8 mm thick.
Dessert apples provide a sweeter flavour and hold their shape better than Bramley apples, giving the tart attractive slices beneath the pastry. If the caramel has hardened while cooling, this is normal; it will soften again as the tart bakes.
Step 09 – Arrange the Apples Over the Caramel
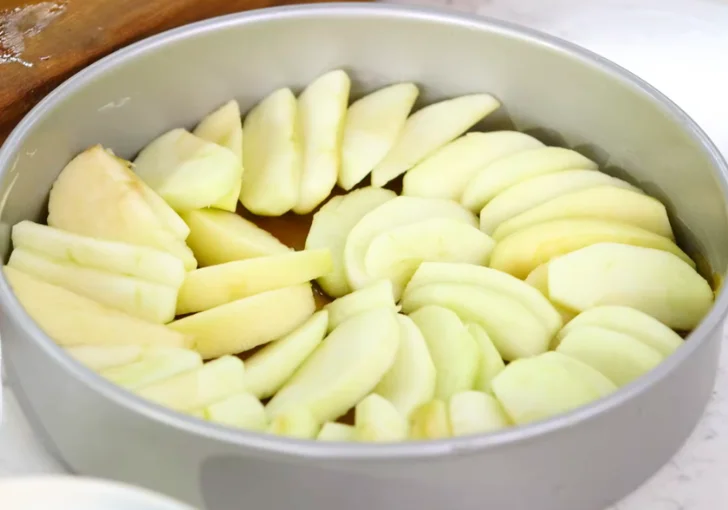
Arrange the sliced dessert apples over the caramel in the base of the tin. Start at the outside edge and work towards the centre, overlapping the slices slightly to create a neat circular pattern. Position the slices closely together, as the apples will shrink as they cook.
Fill any gaps with smaller pieces, then scatter the remaining slices over the top in a more casual arrangement. Aim for an even layer without leaving large spaces.
Step 10 – Spread the Bramley Apple Purée
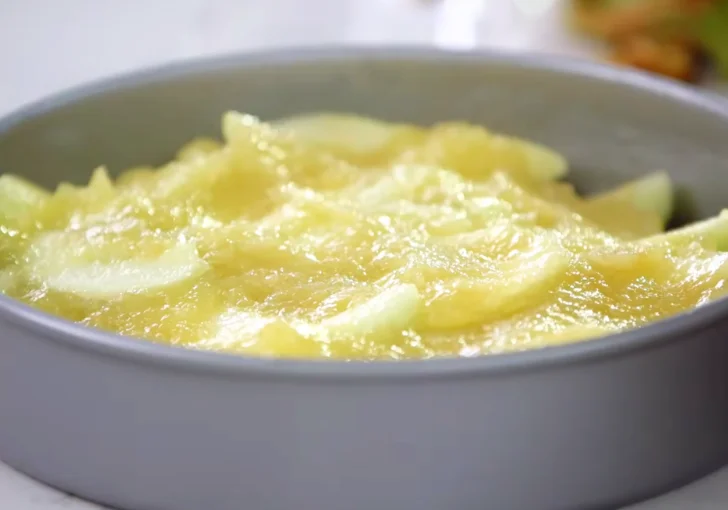
Spoon the prepared Bramley apple purée over the arranged dessert apples. Spread it gently into an even layer, taking care not to shift the decorative apple slices underneath. The purée adds another layer of apple flavour and gives the tart a soft, almost melting centre.
Keep the layer relatively level and avoid adding excess liquid, as a wet filling can prevent the pastry from becoming properly crisp.
Step 11 – Prepare the Puff Pastry
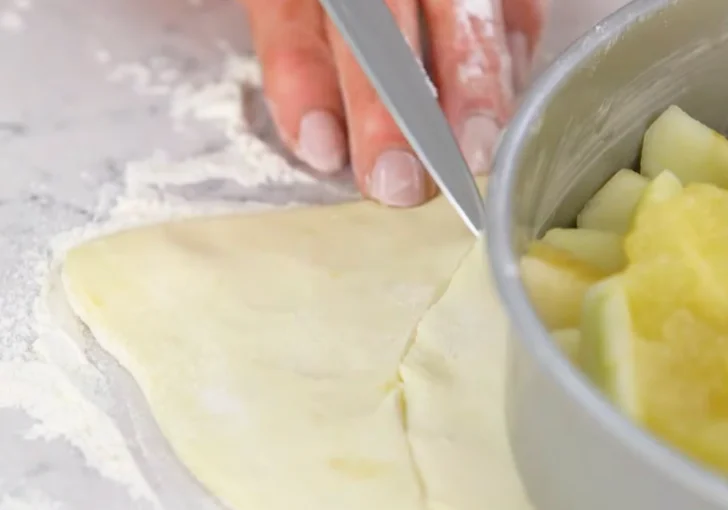
Unroll the 320 g sheet of ready-rolled puff pastry onto a lightly floured work surface if necessary. Place the cake tin upside down over the pastry as a guide, then cut a circle slightly larger than the tin, leaving approximately 2–3 cm extra around the edge.
The additional pastry allows you to tuck the edges down around the filling, helping to contain the apples and creating a neat finish after baking.
Step 12 – Cover the Apples with Pastry
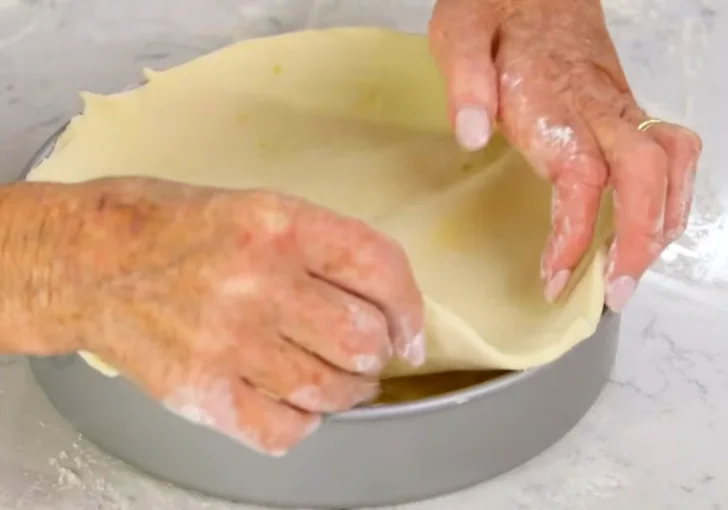
Carefully lift the pastry circle and place it over the apple purée, covering the entire surface. Gently tuck the excess pastry down around the inside edge of the tin using your fingertips or the back of a spoon.
Work around the circumference until the pastry forms a snug cover over the filling. Avoid pressing too firmly into the apples, as the fruit should remain in place beneath the pastry.
Step 13 – Cut a Small Cross in the Pastry
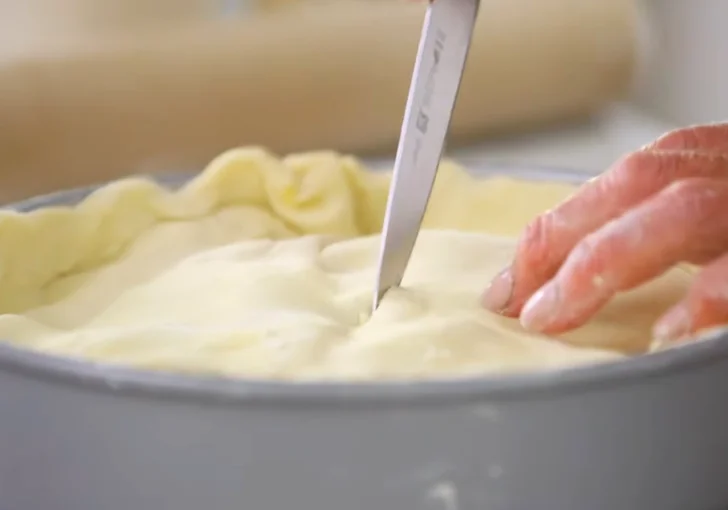
Using a sharp knife, cut a small cross in the centre of the pastry. Make two short intersecting cuts, just enough to allow steam to escape during baking.
This helps reduce the build-up of moisture beneath the pastry and encourages a crisp, golden finish. Keep the cuts small so the pastry retains its shape and the apple filling remains covered.
Step 14 – Bake Until Golden and Crisp
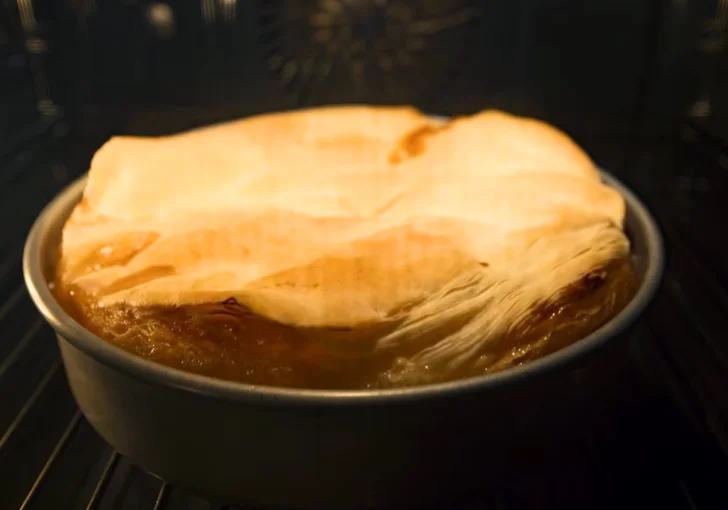
Place the cake tin on the middle shelf of the preheated oven and bake at 200°C fan for approximately 40 minutes. The pastry should rise, turn golden brown and look crisp across the surface.
If the pastry begins to brown too quickly, check the oven temperature and loosely cover the top with foil for the remainder of the cooking time.
The filling should be bubbling around the edges when the tart is ready. If the pastry remains pale or undercooked, allow a little extra baking time.
Step 15 – Rest the Tart Before Turning It Out
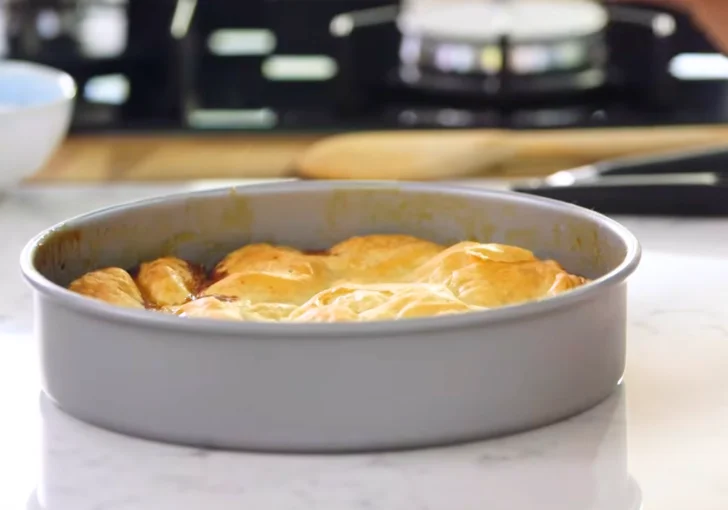
Remove the tin from the oven and place it on a heatproof surface. Allow the tart to stand for approximately 5–10 minutes so the bubbling caramel settles slightly, but do not leave it until the caramel becomes completely cold and firmly set. Run a thin knife carefully around the inside edge of the tin to loosen any pastry that may be sticking.
Wear oven gloves and keep hands and wrists away from the hot caramel, which may still be liquid beneath the pastry.
Step 16 – Turn Out the Tarte Tatin
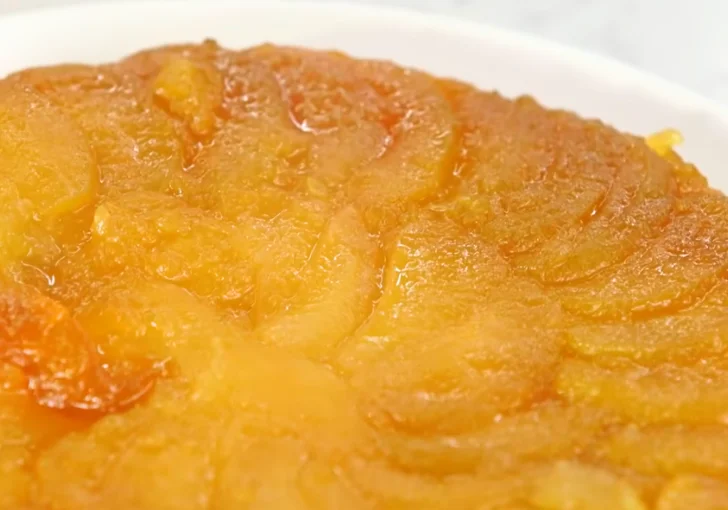
Place a large heatproof serving plate over the cake tin. Holding the plate and tin firmly together with oven gloves, invert them in one confident movement. Keep the plate level and lift the tin away slowly. The caramel-coated apples should now sit on top, with the golden puff pastry underneath.
If a few apple slices remain stuck to the tin, lift them out carefully with a spatula and return them to their places on the tart. Allow any caramel left in the tin to cool before handling it further.
Step 17 – Serve with Crème Fraîche
Serve the Tarte Tatin warm, cutting it into generous slices so each portion includes the glossy caramelised apples, soft Bramley apple purée and crisp puff pastry. Add a spoonful of crème fraîche alongside each slice to balance the sweetness of the caramel with its gentle tang.
For the best texture, serve soon after turning out, while the pastry remains crisp and the apples are still warm.
How to Tell When the Caramel Is Ready
You want a pale golden colour, a bit like runny honey. The syrup also thickens and the bubbles get slower and bigger. That is your cue to take the pan off the heat.
Caramel darkens very fast, often in under a minute, and it keeps cooking from the heat of the pan. So never wander off to answer the phone or check on something else. Stay at the hob and watch.
If the sugar crystallises and turns grainy, you probably stirred it or had a speck of dirt in the pan. Tip it out, wash the pan and start again. If the caramel goes too dark and smells burnt, bin it. Burnt caramel tastes bitter and ruins the tart.
Tips & Notes for Crispy Mary Berry Tarte Tatin
- Use a light-coloured stainless steel pan, so you can see the caramel colour change.
- Cook the purée until it holds its shape on a spoon. A wet purée means soggy pastry.
- Keep the pastry cold until the last minute, for a better rise.
- Pack the apples in tightly. They shrink a lot in the oven.
- Tuck the pastry edge in well. It stops the filling bubbling over.
- Run a knife round the edge before you flip. It stops the pastry tearing.
- Serve soon after turning out. The pastry is at its crispest in the first hour.
Mistakes To Avoid While Making
- Stirring the sugar. It makes the sugar crystallise. Swirl the pan instead.
- Walking away from the caramel. It burns in seconds. Stay put.
- Using a loose-bottomed tin. The caramel leaks out. Choose a fixed-base tin.
- Leaving the purée wet. It makes the pastry soggy. Cook it down until thick.
- Waiting too long to flip. Cold caramel sets hard and glues the apples down. Flip after 5 to 10 minutes.
- Skipping the oven gloves. Hot caramel is dangerous. Always wear them.
Mary Berry Tarte Tatin Variations You Can Try if You Want
Pear Tatin – Swap the dessert apples for firm Conference pears. They give a softer, more floral flavour. Slice them a little thicker, as pears cook faster.
Cinnamon Apple Tatin – Stir half a teaspoon of ground cinnamon into the Bramley purée. It tastes like an apple crumble in tart form.
Salted Caramel Tatin – Sprinkle a pinch of flaky sea salt, such as Maldon, over the caramel before you add the apples. Sweet and salty works a treat.
Ginger and Apple Tatin – Add a small handful of finely chopped stem ginger to the purée. It brings a lovely warm kick, perfect for autumn.
Plum Tatin – Halve firm plums and lay them cut-side down in the caramel. Skip the purée and add an extra tablespoon of sugar if the plums are sharp.
Other Making Options for Mary Berry Tarte Tatin
Fan oven: Bake at 200°C fan for around 40 minutes. Check that the pastry is golden and cooked through before turning out the tart.
Conventional oven: Bake at 220°C conventional for about 40 minutes. If your oven runs hot, check the pastry after 30 minutes and cover it loosely with foil if needed.
Air fryer: This method is best for a smaller tart that fits safely inside your air fryer. Use an oven-safe, fixed-base tin approved for your model, reduce the temperature to around 160–170°C, and start checking after 25 minutes. Cooking time varies, and the centre of the pastry must be fully cooked.
Hob and oven: You can make the caramel on the hob, then assemble the tart and bake it in the oven as directed. Do not put an ordinary cake tin on the hob unless the manufacturer confirms it is safe for direct heat.
What to Serve With This Mary Berry Tarte Tatin
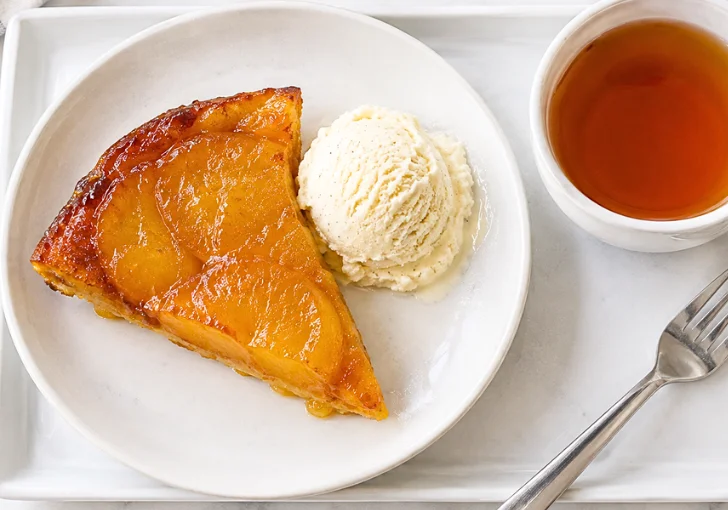
Crème fraîche is the classic partner, and I think it is hard to beat. If you fancy something richer, try a scoop of vanilla ice cream melting over a warm slice.
Thick, hot custard also goes down well on a chilly night, and you might know it from school dinners. Clotted cream is lovely if you want to treat yourself.
For a lighter finish, pour a little cold single cream around the plate. A strong cup of tea or a small glass of dessert wine goes nicely too.
Serve it all on the side, so the pastry stays crisp for as long as possible.
Storing Leftovers, Freezing & Reheating
Storing Leftovers
Let the tart cool, then cover it and place it in the fridge within two hours of baking. Store it in an airtight container or cover the plate well.
For the best quality, eat the leftovers within two days. The pastry will soften as it sits against the apples, but the tart will still taste good.
Freezing
You can freeze leftover portions, although the pastry may lose some of its crispness after thawing. Let the tart cool completely, cut it into slices and wrap each slice well.
Place the wrapped portions in a freezer-safe container and freeze for up to two months for best quality. Defrost in the fridge overnight, and do not refreeze portions that have already thawed.
Reheating
For a crispier finish, place a slice on a baking tray and warm it in an oven at 160°C fan for about 10–15 minutes, checking that the centre is hot. A small portion may need less time. Avoid reheating the tart in its original cake tin if the tin is not oven-safe for that use.
A microwave will warm the apples quickly, but it will make the pastry softer. Reheat only the portion you plan to eat.
FAQs
Can I make Tarte Tatin the day before?
Yes, you can, but it tastes best fresh. If you need to prepare ahead, make the purée and slice the apples the day before and keep them in the fridge. Bake the tart on the day, then reheat leftovers for 10 minutes in the oven to bring the crispness back.
Why did my caramel go hard and lumpy?
This usually happens when you stir the sugar as it heats, or when a few grains stick to the side of the pan. The sugar then crystallises. Swirl the pan gently instead of stirring, and wipe down the sides with a clean, damp pastry brush if you see any splashes.
Can I use any apples for Tarte Tatin?
You can, but the choice matters. Bramleys work best for the purée because they cook down fast. For the slices, pick firm dessert apples like Cox, Braeburn or Gala. Soft or floury apples turn to mush in the oven and lose their shape on top of the tart.
Do I need to peel the apples?
Yes, for this version. Apple skins can turn tough once baked and spoil the soft texture of the tart. Peeling also lets the caramel soak into the slices. It only takes a couple of minutes with a good peeler, so it is worth doing.
Can I use shortcrust pastry instead of puff pastry?
You can, though the result is different. Shortcrust gives a crumbly, biscuity base, while puff pastry gives light, flaky layers. Puff is the classic choice and works best with this Mary Berry Tarte Tatin recipe. Shortcrust will not rise, so roll it slightly thicker.
Why is my pastry soggy?
Soggy pastry usually means too much moisture. A watery purée is the most common cause. Cook it until it holds its shape on a spoon, and let it cool slightly before spreading it. Also check your oven is fully hot before the tart goes in, and cut a small cross for steam.
Can I make Tarte Tatin without a cake tin?
Yes. An ovenproof frying pan, around 20 cm wide, works well. Make the caramel in the pan, add the apples, then top with pastry and bake. Check that the handle is oven-safe. Be extra careful when you flip it, as the pan stays very hot.
Is Tarte Tatin vegetarian?
It can be. Most ready-rolled puff pastry in the UK is vegetarian, and the other ingredients are plant-based or dairy. Always read the pastry label, as some brands use animal fat. For a vegan tart, pick a dairy-free pastry and use a plant-based spread for greasing.
Can I double the recipe for a bigger tart?
I wouldn’t just double it, because the tin size changes everything. For a bigger crowd, make two 20 cm tarts rather than one large one. Caramel is also harder to control in large batches, so it is safer to make it twice.
How do I stop the apples sticking to the tin?
Butter the sides of the tin after you pour in the caramel. Then let the tart rest for 5 to 10 minutes after baking and run a thin knife round the edge. Flip it while the caramel is still warm and runny. Cold caramel sets hard and glues the fruit down.
Mary Berry Tarte Tatin Recipe (a must try traditional homemade)
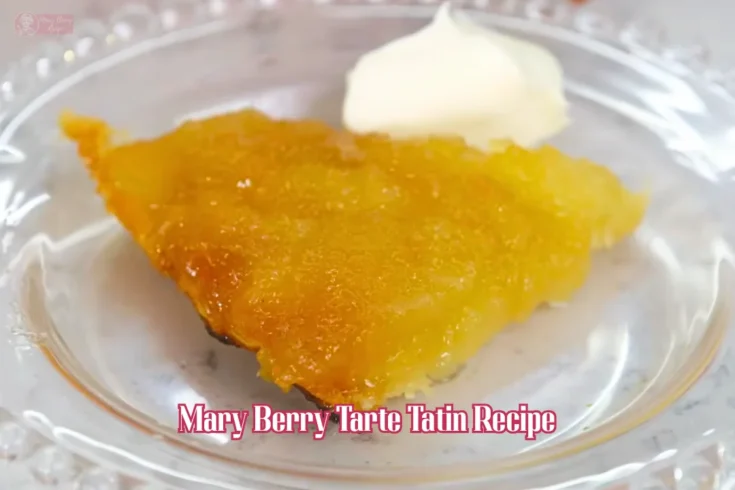
This Mary Berry Tarte Tatin Recipe brings sweet caramelised apples, flaky puff pastry, and a soft Bramley apple purée together in one lovely dessert. I use ready-rolled pastry to keep things simple, with around 60 minutes of cooking and prep. Try this easy French apple tart for a homemade treat, and serve your slice with crème fraîche or vanilla ice cream.
Ingredients
For the caramel
- 150 g caster sugar
- 3 tbsp water
For the apple purée
- 1 large Bramley cooking apple, approximately 250–300 g
- 1 tbsp caster sugar, or to taste
- 1 tbsp water, if needed
For the apple filling
- 4 medium English dessert apples, approximately 600–700 g before preparation
- 15 g butter, softened, for greasing the tin
For the pastry and serving
- 320 g sheet of ready-rolled puff pastry
- Crème fraîche, to serve
Instructions
- Prepare the Equipment and Ingredients: Preheat the oven to 200°C fan (220°C conventional). Prepare a 20 cm fixed-base cake tin, a stainless steel saucepan, a chopping board, a sharp knife and a small saucepan with a lid for the apple purée. Measure the sugar and water before starting the caramel, as the process requires careful attention once the sugar begins to colour. Choose a cake tin with sides deep enough to hold the apples and caramel, and avoid using a loose-bottomed tin because the caramel can leak out.
- Make the Caramel: Place 150 g caster sugar and 3 tablespoons of water in a clean stainless steel saucepan. Set over a low heat and allow the sugar to dissolve gradually, gently swirling the pan if necessary. Avoid stirring once the mixture begins to heat, as agitation can encourage crystallisation. When no sugar granules remain, increase the heat to a steady boil. Let the syrup bubble until it thickens slightly and turns a pale golden colour. Watch it closely, as caramel can darken very quickly and develop a bitter taste if it burns.
- Pour the Caramel into the Cake Tin: As soon as the caramel reaches a pale golden colour, remove the saucepan from the heat. Carefully pour the hot caramel into the base of the unbuttered fixed-base cake tin, tilting the tin gently so the caramel spreads across the bottom in an even layer. Take care not to touch or taste the caramel, as hot sugar can cause severe burns. Set the tin aside on a heatproof surface and allow the caramel to settle while preparing the apples.
- Prepare the Bramley Apple Purée: Peel the large Bramley apple, cut it into quarters and remove the core. Chop the flesh into small pieces so it cooks evenly. Place the apple in a small saucepan with 1 tablespoon of caster sugar and, if necessary, 1 tablespoon of water to prevent it catching at the beginning. Bramley apples are naturally tart and break down readily during cooking, making them ideal for a smooth purée.
- Cook the Apple Purée Until Soft: Cover the saucepan with a lid and cook the apple over a low to medium heat, stirring occasionally to prevent it sticking to the bottom. The lid traps steam and helps the apple soften without requiring much additional liquid. Continue cooking until the pieces have collapsed completely into a soft mush, adding a small splash of water only if the pan becomes too dry. This should take approximately 10–15 minutes, depending on the apple and the size of the pieces.
- Mash the Purée Until Smooth: Remove the lid and mash the cooked apple thoroughly with a fork or potato masher until it forms a thick, soft purée. If the mixture appears watery, cook it uncovered for another minute or two, stirring frequently, until the excess moisture evaporates. Taste the purée and add a little more sugar if the Bramley apple is particularly sharp. Leave it to cool slightly before assembling the tart so it does not make the pastry soggy.
- Butter the Cake Tin: Once the caramel has settled in the base of the cake tin, carefully grease the sides of the tin with the 15 g softened butter. Spread the butter evenly around the inside edges without disturbing the caramel layer at the bottom. Although the tin was left unbuttered when the caramel was poured in, greasing the sides now helps prevent the apples and pastry from sticking during baking and makes the finished tart easier to release.
- Peel and Slice the Dessert Apples: Peel the four dessert apples, cut them into quarters and remove the cores. Slice each quarter into even pieces, approximately 5–8 mm thick. Dessert apples provide a sweeter flavour and hold their shape better than Bramley apples, giving the tart attractive slices beneath the pastry. If the caramel has hardened while cooling, this is normal; it will soften again as the tart bakes.
- Arrange the Apples Over the Caramel: Arrange the sliced dessert apples over the caramel in the base of the tin. Start at the outside edge and work towards the centre, overlapping the slices slightly to create a neat circular pattern. Position the slices closely together, as the apples will shrink as they cook. Fill any gaps with smaller pieces, then scatter the remaining slices over the top in a more casual arrangement. Aim for an even layer without leaving large spaces.
- Spread the Bramley Apple Purée: Spoon the prepared Bramley apple purée over the arranged dessert apples. Spread it gently into an even layer, taking care not to shift the decorative apple slices underneath. The purée adds another layer of apple flavour and gives the tart a soft, almost melting centre. Keep the layer relatively level and avoid adding excess liquid, as a wet filling can prevent the pastry from becoming properly crisp.
- Prepare the Puff Pastry: Unroll the 320 g sheet of ready-rolled puff pastry onto a lightly floured work surface if necessary. Place the cake tin upside down over the pastry as a guide, then cut a circle slightly larger than the tin, leaving approximately 2–3 cm extra around the edge. The additional pastry allows you to tuck the edges down around the filling, helping to contain the apples and creating a neat finish after baking.
- Cover the Apples with Pastry: Carefully lift the pastry circle and place it over the apple purée, covering the entire surface. Gently tuck the excess pastry down around the inside edge of the tin using your fingertips or the back of a spoon. Work around the circumference until the pastry forms a snug cover over the filling. Avoid pressing too firmly into the apples, as the fruit should remain in place beneath the pastry.
- Cut a Small Cross in the Pastry: Using a sharp knife, cut a small cross in the centre of the pastry. Make two short intersecting cuts, just enough to allow steam to escape during baking. This helps reduce the build-up of moisture beneath the pastry and encourages a crisp, golden finish. Keep the cuts small so the pastry retains its shape and the apple filling remains covered.
- Bake Until Golden and Crisp: Place the cake tin on the middle shelf of the preheated oven and bake at 200°C fan for approximately 40 minutes. The pastry should rise, turn golden brown and look crisp across the surface. If the pastry begins to brown too quickly, check the oven temperature and loosely cover the top with foil for the remainder of the cooking time. The filling should be bubbling around the edges when the tart is ready. If the pastry remains pale or undercooked, allow a little extra baking time.
- Rest the Tart Before Turning It Out: Remove the tin from the oven and place it on a heatproof surface. Allow the tart to stand for approximately 5–10 minutes so the bubbling caramel settles slightly, but do not leave it until the caramel becomes completely cold and firmly set. Run a thin knife carefully around the inside edge of the tin to loosen any pastry that may be sticking. Wear oven gloves and keep hands and wrists away from the hot caramel, which may still be liquid beneath the pastry.
- Turn Out the Tarte Tatin: Place a large heatproof serving plate over the cake tin. Holding the plate and tin firmly together with oven gloves, invert them in one confident movement. Keep the plate level and lift the tin away slowly. The caramel-coated apples should now sit on top, with the golden puff pastry underneath. If a few apple slices remain stuck to the tin, lift them out carefully with a spatula and return them to their places on the tart. Allow any caramel left in the tin to cool before handling it further.
- Serve with Crème Fraîche: Serve the Tarte Tatin warm, cutting it into generous slices so each portion includes the glossy caramelised apples, soft Bramley apple purée and crisp puff pastry. Add a spoonful of crème fraîche alongside each slice to balance the sweetness of the caramel with its gentle tang. For the best texture, serve soon after turning out, while the pastry remains crisp and the apples are still warm.
Nutrition Information:
Serving Size:
6 slicesAmount Per Serving: Calories: 300
This Mary Berry Tarte Tatin recipe is a lovely choice when you want a homemade pudding that looks smart but uses simple ingredients.
The key is to watch the caramel, keep the apple purée thick and give the puff pastry enough time to turn golden and crisp.
Once you have made it, you may find yourself coming back to it whenever good apples are in season.
Serve it warm with crème fraîche, cut a generous slice and enjoy the mix of sweet apples and flaky pastry.