Mary Berry Lemon Curd Recipe (15 Minute Curd)
This Mary Berry Lemon Curd Recipe is one of those simple recipes that makes a big difference to a dessert. It’s thick, smooth and creamy, with a fresh lemon flavour that is sweet, sharp and full of zest.
Made with fresh lemon juice, lemon zest, eggs, caster sugar and butter, it has a lovely homemade taste that you just don’t get from every shop-bought jar.
I first liked lemon curd for how easy it is to use. A few spoonfuls can turn a plain sponge, warm scone or slice of toast into something much more special.
The cold butter added at the end is one of the little steps I really like in this recipe. It gives the curd a soft, silky texture and a rich finish.
Today, I’m sharing my version of this classic Mary Berry lemon curd recipe, with simple steps and helpful tips to keep it smooth.
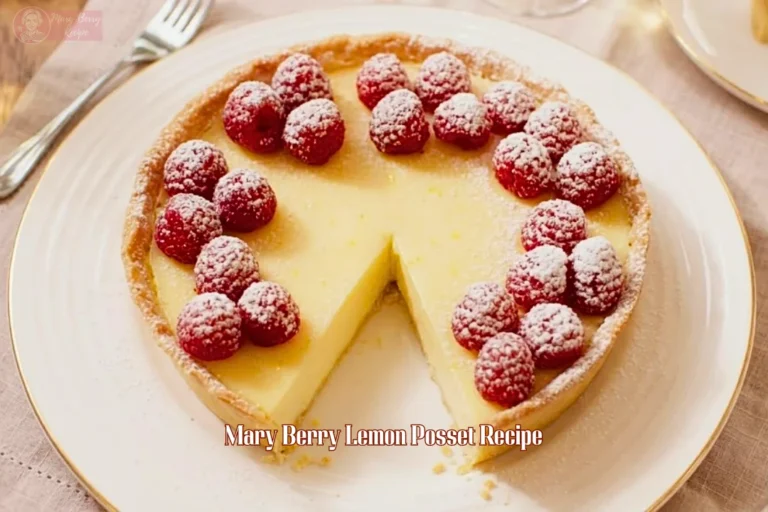
Once chilled, it’s ready for cakes, cupcakes, tarts, Pavlova, pastries or a good old scone. Let’s make a jar and put those lemons to good use.

Why This Mary Berry Lemon Curd Recipe Works
Fresh lemon flavour – I use both lemon zest and fresh juice. This gives the curd a much fuller taste than juice alone.
A good balance – The caster sugar takes the edge off the sharp lemon without hiding it.
Eggs do the thickening – I use whole eggs and extra yolks, which gives the curd a rich, spoonable texture.
Butter makes it silky – Cold cubes of unsalted butter melt into the warm curd and give it a smooth finish.
Low heat matters – I keep the pan over low heat and whisk all the time. It takes a little patience, but the result is worth it.
Straining helps – I always strain the finished curd. It catches tiny cooked egg pieces and gives me a much cleaner texture.
Perfect For
Morning toast: Spread it over warm toast with a little butter underneath.
Afternoon scones: It makes a lovely change from jam.
Simple cakes: Spoon it between cake layers for a fresh lemon filling.
Dessert topping: Add a spoonful to yoghurt, ice cream or a Pavlova.
Tarts: Use it as a bright filling for a simple pastry case.
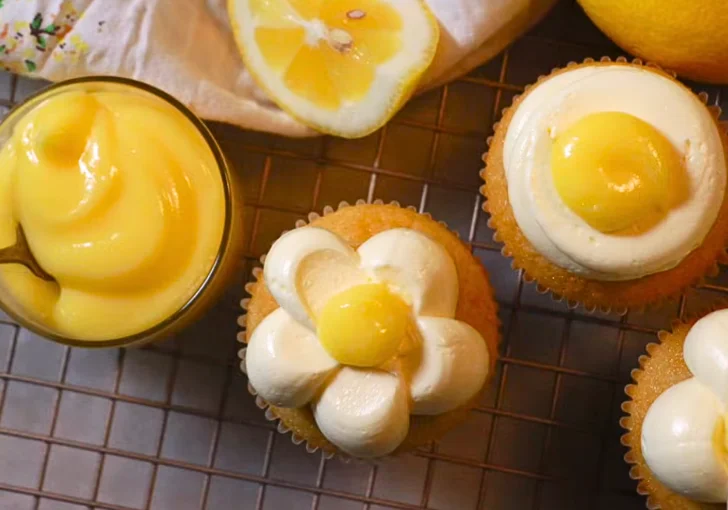
Cupcakes: A little hollow in the centre filled with lemon curd makes a nice surprise.
Gifts: Small chilled jars make a thoughtful homemade treat. Keep them refrigerated.
Mary Berry Lemon Curd Ingredients
3 large eggs – Free-range eggs from a brand like Clarence Court give the curd a deeper yellow colour and a richer taste overall. Whole eggs add body to the mixture, helping it set thick enough to spread without turning rubbery once chilled.
3 large egg yolks – The extra yolks make this curd silkier and richer than eggs alone would manage. Save the leftover whites for meringues or a plain omelette another day, so nothing in your kitchen goes to waste.
225g caster sugar – Tate & Lyle caster sugar dissolves quickly and leaves a smooth finish behind. Caster sugar works better than granulated here, since the fine grains melt straight into the eggs without leaving any gritty texture in the curd.
Zest of 3 unwaxed lemons – Always reach for unwaxed lemons, since the wax coating on ordinary ones can affect both the flavour and texture of the zest. Most of the lemon’s fragrance and depth actually lives in the zest, not the juice.
150ml fresh lemon juice – Squeeze your own from roughly three lemons rather than pouring from a bottle like Jif. Fresh juice gives a brighter, more natural tang that bottled juice simply cannot match once it hits the pan.
100g unsalted butter – Cold butter from Lurpak or Anchor, cut into small cubes, melts slowly into the hot curd once it comes off the heat. This keeps the whole mixture glossy and stops it turning oily or splitting apart.
Ingredient Notes & Smart Substitutions for This Lemon Curd
- Use unwaxed lemons if you can. Since the peel goes straight into the curd, I prefer lemons sold as unwaxed. If your lemons are waxed, scrub and rinse them well before zesting.
- Fresh juice is worth using. Bottled lemon juice can work when needed, but I find fresh juice gives a much nicer flavour. It tastes brighter and less harsh.
- Unsalted butter is my first choice. Salted butter will still make a usable curd, but the taste can be slightly different. Unsalted gives a cleaner lemon flavour.
- Need a thicker curd? You can use around 200g butter instead of 100g, as noted in the supplied method. Keep in mind that this will make the curd richer too.
- Do not swap caster sugar for granulated sugar if you can avoid it. Granulated sugar can work, but caster sugar dissolves more easily and makes the mixture smoother from the start.
- Use a heavy-based pan. A thin saucepan can create hot spots. That makes the eggs more likely to cook too quickly.
How To Make Mary Berry Lemon Curd
Step 1 – Combine the Eggs and Sugar
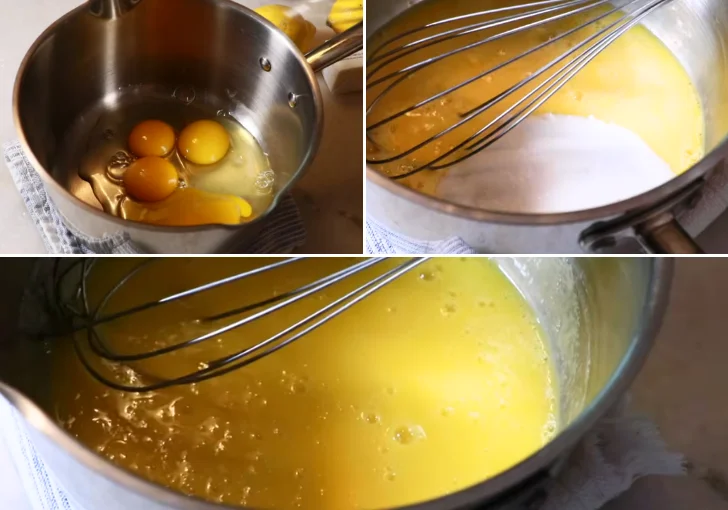
Place the 3 whole eggs, 3 egg yolks and 225g caster sugar into a heavy-based saucepan. Whisk thoroughly until the eggs and sugar are completely combined and the mixture looks smooth.
Whisking the eggs well before heating is important because the sugar helps protect the eggs from cooking too quickly. This reduces the risk of ending up with scrambled-egg-like pieces in the curd.
Step 2 – Add the Lemon Zest
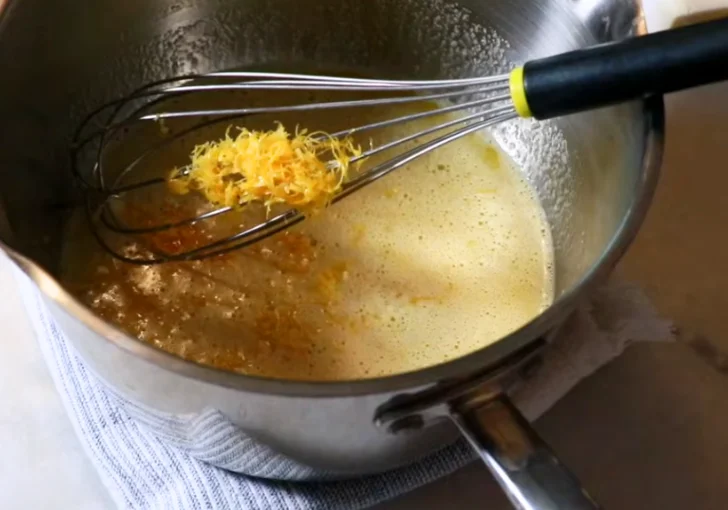
Add the finely grated zest of 3 lemons to the egg mixture. Mix well so the zest is evenly distributed throughout the mixture.
The lemon zest adds concentrated citrus flavour and gives the finished curd a more pronounced lemon aroma.
Step 3 – Add the Fresh Lemon Juice
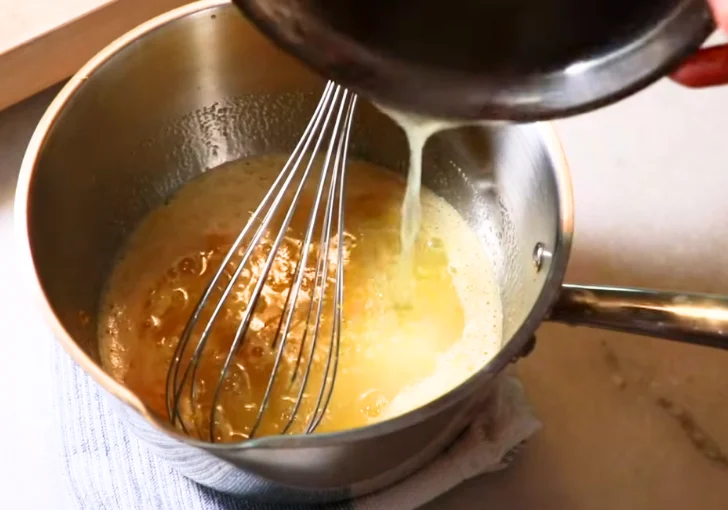
Pour in 150ml freshly squeezed lemon juice. You can add it all at once or gradually, mixing well after each addition. Fresh lemon juice gives the curd a brighter, tangier flavour than bottled lemon juice. Mix until the ingredients are thoroughly combined.
Step 4 – Start Cooking Over Low Heat
Place the saucepan over low heat. Begin whisking continuously and evenly as the mixture warms.
This is one of the most important stages of making lemon curd. Keep the whisk moving so the eggs cook gradually rather than setting into pieces. Pay particular attention to the edges and bottom of the saucepan, where the mixture can cook faster.
Step 5 – Keep Whisking and Scrape the Pan
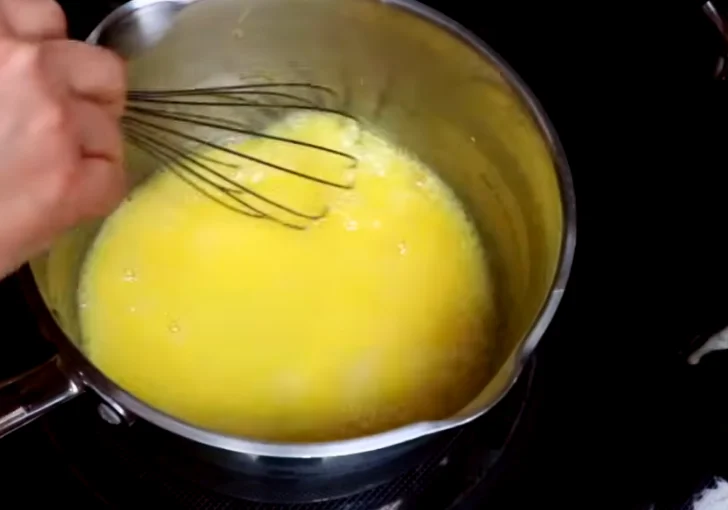
As the mixture heats, continuously scrape around the sides and bottom of the pan with the whisk. Move the saucepan around slightly as you whisk if this helps distribute the heat more evenly.
Do not rush this stage by turning the heat up high. Gentle heat and constant mixing help produce a smooth, creamy curd.
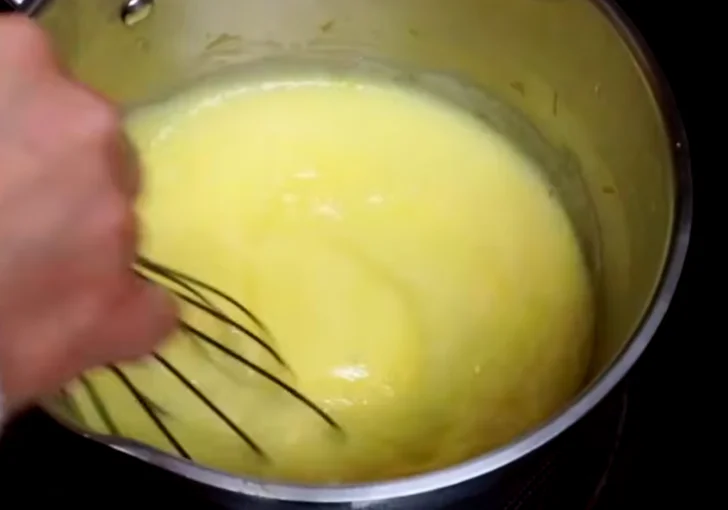
Step 6 – Whisk Faster as the Curd Thickens
After several minutes, the mixture will begin to thicken gradually. Once you notice the liquid becoming noticeably thicker, whisk more rapidly.
Continue scraping the edges and bottom of the saucepan while whisking so no part of the mixture becomes overheated. As the curd becomes thicker, any foam or bubbles on the surface will gradually disappear.
Step 7 – Cook Until It Reaches a Full Boil
Continue cooking and whisking until the lemon curd begins to bubble or boil across the surface. This stage ensures that the eggs are fully cooked.
Keep whisking while the curd reaches this point, taking care that it does not catch on the bottom of the saucepan.
Once the curd has reached a thick, smooth consistency and has boiled across the surface, remove the saucepan from the heat.
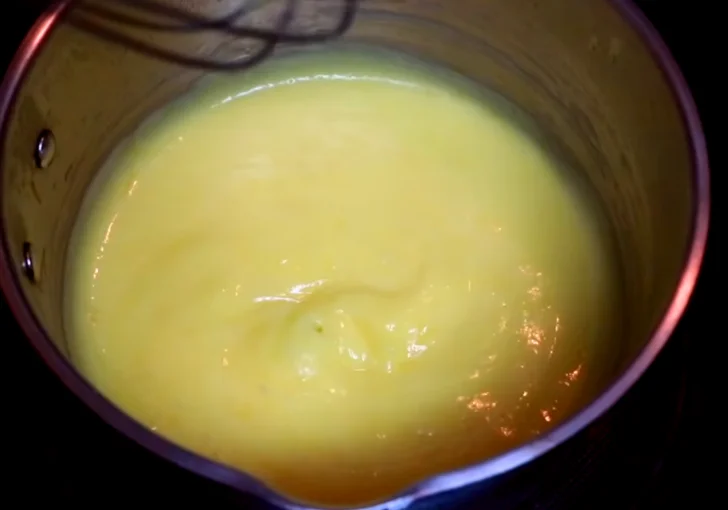
Step 8 – Add the Cold Butter
Immediately add 100g cold unsalted butter, cut into small cubes. Whisk until all the butter has completely melted and the curd is smooth and glossy.
The cold butter enriches the curd, gives it a silky texture and helps balance the sharpness of the lemon. For a thicker curd: use approximately 200g butter instead of 100g.
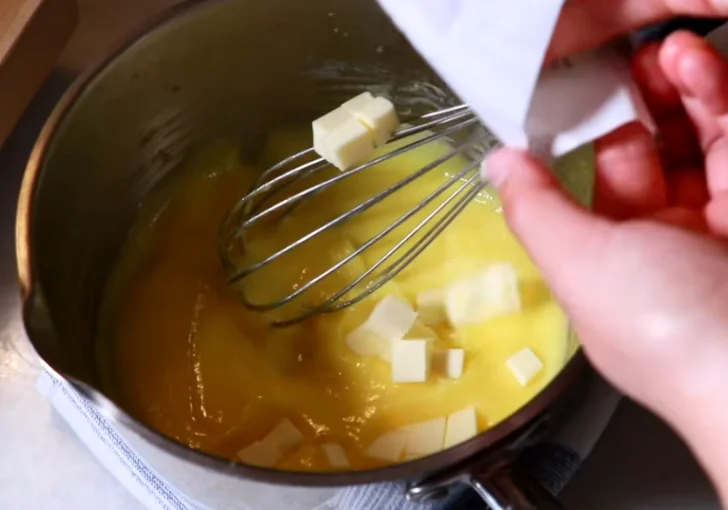
Step 9 – Strain the Lemon Curd
For an especially smooth result, place a fine-mesh sieve over a clean bowl. Pour the warm lemon curd through the sieve and use a spatula to gently push it through.
Straining removes the lemon zest and any tiny pieces of egg that may have cooked during heating, leaving a smooth, velvety curd.
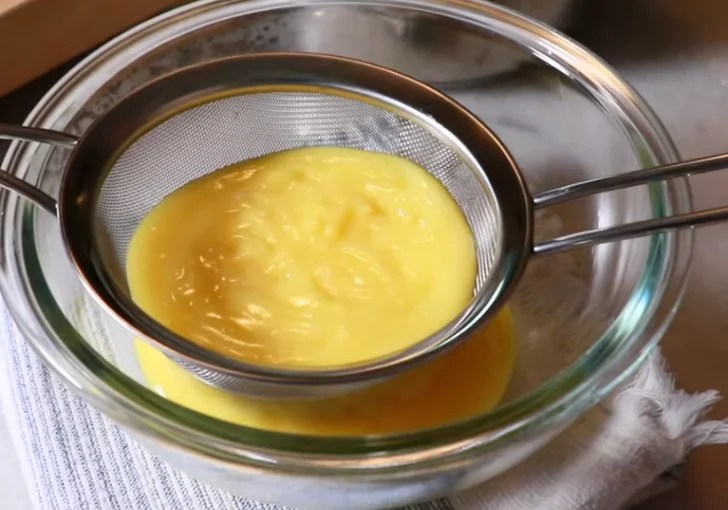
Step 10 – Cover and Chill
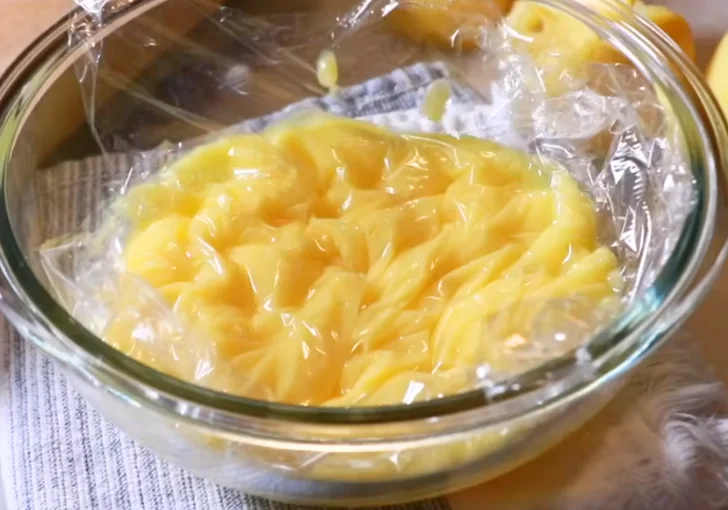
Transfer the strained curd to a clean container. Press cling film directly onto the surface of the curd so that there is no exposed air between the curd and the covering.
Refrigerate until completely chilled and set, preferably for at least 2 hours. The curd will become noticeably thicker as it cools.
Step 11 – Serve and Use
Once chilled, the lemon curd is ready to use. It works particularly well as a filling or flavouring for:
- Lemon cakes
- Cupcakes
- Macarons
- Buttercream
- Tarts
- Pavlovas
- Scones
- Toast and pastries
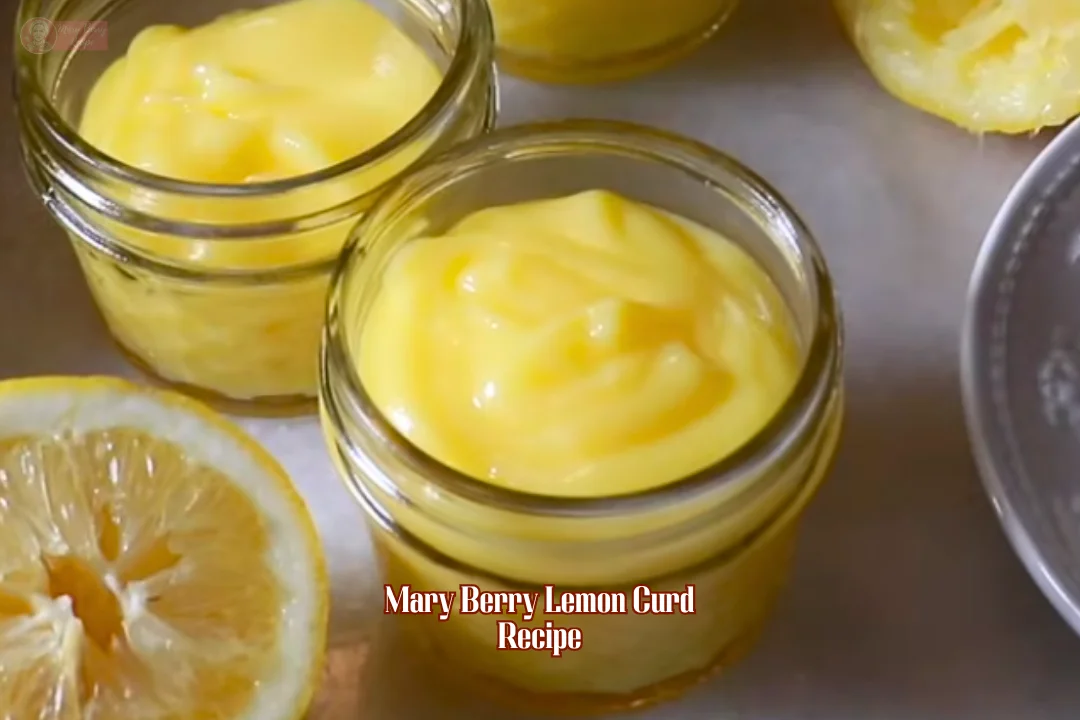
What Does Perfect Lemon Curd Look Like
I look for a few simple signs before I call the curd done:
- Glossy
- Smooth
- Bright yellow
- Thick enough to spread
- Soft enough to spoon
- No visible scrambled egg
- No watery separation
The texture can change quite a lot as it cools, so do not judge it only while it is hot.
If the curd is too thin, it may simply need more cooking or more time in the fridge. Hot lemon curd is much looser than chilled curd.
If it is too thick, it may have cooked for too long. Extra butter can also make the texture richer and firmer once chilled.
A grainy curd usually means the mixture got too hot or cooked too hard. A lumpy curd means some of the egg set too quickly. This is why I keep the heat low and whisk without stopping.
7 Secrets to Smooth, Never-Scrambled Lemon Curd
- Keep the heat low the whole way through, and resist the urge to turn it up to speed things along.
- Use a heavy-based saucepan rather than a thin one, since it spreads heat more evenly and avoids hot spots forming.
- Whisk in a figure-of-eight motion instead of round and round, so you cover the entire base of the pan.
- If you ever see steam rising fast, lift the pan off the heat for a few seconds while you keep whisking.
- Add the butter in small cubes rather than one block, so it melts evenly and cools the mixture gently as it goes in.
- Pour the strained curd into a bowl that is completely cool and dry, since a warm bowl can thin it out again.
- Never step away from the pan, even for a minute, since lemon curd can turn from perfect to scrambled surprisingly fast.
Mary Berry Lemon Curd Variations You Can Try
Orange and Lemon Curd
Replace part of the lemon juice with fresh orange juice. Keep some lemon in the mix so the curd still has a good sharp edge. This makes a softer citrus flavour that works nicely in cakes.
Lime Curd
Use fresh lime juice and finely grated lime zest in place of the lemon. Lime gives the curd a sharper, slightly greener citrus taste. It is especially good with coconut desserts.
Lemon and Passion Fruit Curd
Add a little passion fruit pulp after cooking and straining the curd. The seeds can stay in if you like their crunch, or strain them out for a smoother finish.
Raspberry Lemon Curd
Swirl a little raspberry purée into the cooled lemon curd. Do not add too much liquid, as it can loosen the mixture. The berry taste works beautifully with lemon sponge.
Vanilla Lemon Curd
Add a small amount of vanilla extract after removing the pan from the heat. It rounds out the lemon flavour without taking it away.
Can You Make This Lemon Curd Without a Double Boiler
Yes. This version uses a direct low-heat saucepan method, so you do not need a separate bowl over simmering water.
I find this method quicker and simpler, but you need to stay beside the hob. The eggs sit directly over the heat, so the pan can become too hot if the hob is turned up.
The key is low heat and constant whisking. Pay close attention to the bottom and edges, as these spots heat first.
| Method | Main advantage | Main risk |
|---|---|---|
| Bain-marie | More gentle and forgiving heat | Takes slightly longer |
| Direct saucepan | Faster and simpler | Greater risk of scrambled egg |
If you are making lemon curd for the first time, a bain-marie can give you a little more breathing room. If you are comfortable with your hob, the direct saucepan method works well.
Ways To Use This Homemade Mary Berry Lemon Curd
Once the curd is chilled, there are plenty of ways to use it. I like it spread on warm toast or spooned over a fresh scone. It also makes a lovely cake filling, especially with a plain sponge or lemon drizzle cake.
For dessert, try a spoonful with yoghurt, ice cream or Pavlova. It can fill small pastry cases for easy lemon tarts too.
Cupcakes are another good choice. Cut a small hole in the middle, add some curd, then cover with buttercream.
If you have a jar sitting in the fridge, it is easy to turn a plain pudding into something much more interesting.
Make-Ahead, Storing & Freezing Instructions
I normally make lemon curd ahead because it needs at least 2 hours to chill and set. Once cool, keep it in a clean, covered container in the fridge. I prefer to use it within 1–2 weeks for the best quality.
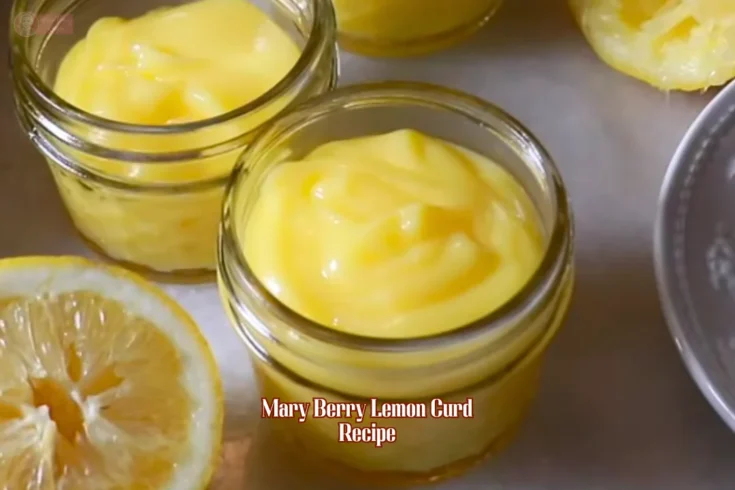
For jar storage, put the hot curd into thoroughly clean, heat-safe jars, seal them, then cool and refrigerate. Do not treat homemade lemon curd like a shelf-stable preserve; it needs to stay chilled.
Lemon curd can also be frozen. Spoon it into a freezer-safe container, leaving a little room for expansion. Freeze for up to 3 months.
Thaw it in the fridge overnight, then stir well before using. If the texture looks slightly changed after freezing, a gentle stir usually helps bring it back together.
Mary Berry Lemon Curd Recipe FAQs
Can I use bottled lemon juice for lemon curd?
You can use bottled lemon juice if fresh lemons are not available, but I recommend fresh juice for this recipe. Fresh lemons give a cleaner taste and work with the zest to give the curd a stronger lemon flavour. Bottled juice can sometimes taste harsher or flatter.
Why does my lemon curd taste bitter?
The most common reason is too much white pith from the lemon peel. When grating the zest, take only the thin yellow outer skin. The white part underneath is bitter. Very strong lemon juice can also make the curd taste sharp, but sugar and butter should balance it.
How long does lemon curd take to thicken?
The cooking time is usually around 10–15 minutes, but the exact time depends on your hob, saucepan and heat level. I watch the texture rather than the clock. The curd should become noticeably thick while cooking, then firm up more after at least 2 hours in the fridge.
Why did my lemon curd turn into scrambled eggs?
This usually happens because the mixture gets too hot or sits against a hot part of the pan without enough stirring. Keep the hob on low and whisk constantly. A heavy-based saucepan helps too. If you notice small cooked egg pieces, strain the warm curd before chilling.
Should lemon curd be runny when it is hot?
Yes, hot lemon curd is softer than chilled curd. It should still look thick and creamy by the end of cooking, but it will not have the same firm, spreadable texture it gets after cooling. Give it at least 2 hours in the fridge before deciding it has failed.
Can I make lemon curd with only egg yolks?
Yes, but it will give you a different recipe. Egg yolks make a rich and creamy curd, while whole eggs provide extra structure. This recipe uses both whole eggs and extra yolks to create a balance between a thick texture and a rich finish.
Can I make this lemon curd without butter?
You can make lemon curd without butter, but the finished spread will not be as rich or silky. Butter also helps soften the sharp lemon taste. If you leave it out, expect a lighter curd with a different texture. For this particular recipe, I recommend keeping the butter.
Can I use salted butter?
Salted butter can be used if that is all you have. I prefer unsalted butter because it keeps the lemon flavour clean and gives you better control over the final taste. If using salted butter, there is no need to add extra salt to this recipe.
Why do I need to strain lemon curd?
Straining gives you a much smoother finished curd. It removes the lemon zest and catches tiny pieces of egg that may have cooked during heating. Even when I whisk carefully, I still like to strain the curd. It takes only a minute and gives a nicer texture.
How do I know when lemon curd is ready?
The curd should look glossy, smooth and thick. It should coat the spoon and feel much heavier than the original egg and lemon mixture. It will also become firmer once chilled. Avoid relying only on colour or cooking time; the texture is the best guide.
How should I store lemon curd in jars?
Use clean, heat-safe jars and transfer the curd while it is still hot. Seal the jars, allow them to cool, then keep them refrigerated. Homemade lemon curd is not a shelf-stable preserve, so sealed jars should still be stored in the fridge rather than kept in a cupboard.
Can I make lemon curd a day before serving?
Yes, and I often prefer doing it this way. Making it the day before gives the curd plenty of time to cool and set. Keep it covered in the fridge. When you need it, give it a gentle stir and spoon it into cakes, tarts, scones or desserts.
Why is my lemon curd grainy?
Graininess usually comes from cooking the eggs too hard. High heat can make the egg proteins set quickly, which gives the curd a rough texture. Keep the heat low, whisk throughout cooking and remove the pan from the hob once the curd is properly thick.
Can I use this lemon curd as a cake filling?
Yes. Chilled lemon curd makes a lovely cake filling. Spread a thin layer between sponge cakes, or use it inside cupcakes. For a layer cake, keep the curd slightly away from the very edge if you are worried about it squeezing out when the next layer goes on.
Mary Berry Lemon Curd Recipe (15 Minute Curd)
Make this Mary Berry Lemon Curd Recipe with fresh lemons, eggs, caster sugar and butter. It takes about 10 minutes to prep and 10–15 minutes to cook, giving you a smooth, thick lemon curd with a fresh, tangy taste. The simple low-heat method helps prevent scrambled egg and the cold butter gives it a silky finish. Once chilled, spoon it over scones, spread it on toast, or use it in cakes, tarts and cupcakes. This easy homemade lemon curd is worth keeping in your fridge.
Ingredients
- 3 large eggs
- 3 large egg yolks
- 225g caster sugar
- Finely grated zest of 3 unwaxed lemons
- 150ml freshly squeezed lemon juice — approximately 3 lemons
- 100g unsalted butter, cold and cut into small cubes
Instructions
- Place the 3 whole eggs, 3 egg yolks and 225g caster sugar into a heavy-based saucepan. Whisk thoroughly until the eggs and sugar are completely combined and the mixture looks smooth.
- Add the finely grated zest of 3 lemons to the egg mixture. Mix well so the zest is evenly distributed throughout the mixture.
- Pour in 150ml freshly squeezed lemon juice. You can add it all at once or gradually, mixing well after each addition. Mix until the ingredients are thoroughly combined.
- Place the saucepan over low heat. Begin whisking continuously and evenly as the mixture warms. Pay particular attention to the edges and bottom of the saucepan, where the mixture can cook faster.
- As the mixture heats, continuously scrape around the sides and bottom of the pan with the whisk. Move the saucepan around slightly as you whisk if this helps distribute the heat more evenly.
- After several minutes, the mixture will begin to thicken gradually. Once you notice the liquid becoming noticeably thicker, whisk more rapidly. Continue scraping the edges and bottom of the saucepan while whisking so no part of the mixture becomes overheated.
- Continue cooking and whisking until the lemon curd begins to bubble or boil across the surface. Keep whisking while the curd reaches this point, taking care that it does not catch on the bottom of the saucepan. Once the curd has reached a thick, smooth consistency and has boiled across the surface, remove the saucepan from the heat.
- Immediately add 100g cold unsalted butter, cut into small cubes. Whisk until all the butter has completely melted and the curd is smooth and glossy. For a thicker curd: use approximately 200g butter instead of 100g.
- For an especially smooth result, place a fine-mesh sieve over a clean bowl. Pour the warm lemon curd through the sieve and use a spatula to gently push it through. Straining removes the lemon zest and any tiny pieces of egg that may have cooked during heating, leaving a smooth, velvety curd.
- Transfer the strained curd to a clean container. Press cling film directly onto the surface of the curd so that there is no exposed air between the curd and the covering. Refrigerate until completely chilled and set, preferably for at least 2 hours.
- Once chilled, the lemon curd is ready to use.
Nutrition Information:
Serving Size:
About 1 tablespoon (20g)Amount Per Serving: Calories: 75
This Mary Berry Lemon Curd Recipe is one I would happily make again when I have a few lemons waiting in the fruit bowl. It has a fresh lemon bite, a rich buttery finish and a texture that works with far more than just toast.
The main thing is to keep the heat low and give the pan your attention. Once chilled, it is ready for cakes, scones, tarts and plenty more.